Most ceiling sign hanging mistakes don’t begin with the hardware. They begin with how the installation is planned, how the right components are selected, and how the process is carried out across one location—or hundreds of locations.
A better approach is to plan the hanging system from the ceiling down. Start with the ceiling connection, then consider the suspension material, sign connection, and the sign itself. Taking these elements into account from the beginning can create a safer, more consistent installation while making future sign changes easier.
Here are six things to consider when planning a suspended signage system.
1. Start With the Ceiling Type
The ceiling is the logical starting point for any suspended signage project.
Drop ceilings, open-beam structures, finished ceilings, and other ceiling types require different connection methods. Identifying the ceiling construction before selecting a ceiling hanger helps narrow the options to prevent surprises when it is time to install.
Consider not only what the ceiling looks like, but where and how the signage can be properly supported. A drop-ceiling grid, structural steel member, and finished drywall ceiling each presents different requirements.
Our ceiling type guide can help you identify the type of ceiling you are working with and explore appropriate connection options before placing an order.
2. Consider the Complete Hanging System
Selecting ceiling hanging hardware is only one part of the process. A suspended sign is a system of connected components, and each one needs to be appropriate for the application.
A simple way to think about it is from the ceiling down:
Ceiling connection → Suspension material → Sign connection → Sign
Before selecting components, consider:
- Ceiling type and connection method
- Total suspended weight
- Sign dimensions and substrate
- Strength of the sign material at the attachment points
- Attachment-hole size and location
- Number and spacing of suspension points
- Suspension material
- Sign-connection hardware
- Installation height and environment
The capacity of the complete system is determined by more than the rating of any single component. The assembled hanging system should be appropriate for the intended application and tested before being put into service.
Taking this whole-system approach can also help identify potential issues while changes are still easy to make—before the installer arrives on site.
3. Plan for Repeat Sign Changes
Most promotional and informational signage is not permanent. Seasonal promotions change, stores are reset, departments move, events end, and new graphics replace old ones.
Planning for those future changes from the beginning can make each subsequent installation easier, whether you’re hanging banners from the ceiling or swapping promotional signs.
Reusable suspension materials are one way to accomplish this. LoopLine™, for example, uses continuous two-inch repeating loops that provide consistent attachment points without tying knots. Cutting suspension lines to the same number of loops also makes it easier to position a sign evenly.
Reusable components can often be retained, stored, and used again for the next promotion or display change rather than starting over with new hanging materials.
READY TO BUY?
Shop LoopLine™ for Your Project
LoopLine™
Reusable, knot-free hanging cord with two-inch repeating loops. Available in multiple lengths and tensile strengths.
[Shop now] | [Get a quote]
4. Consider Floor-Level Installation
Installation height is another important part of planning an overhead signage system.
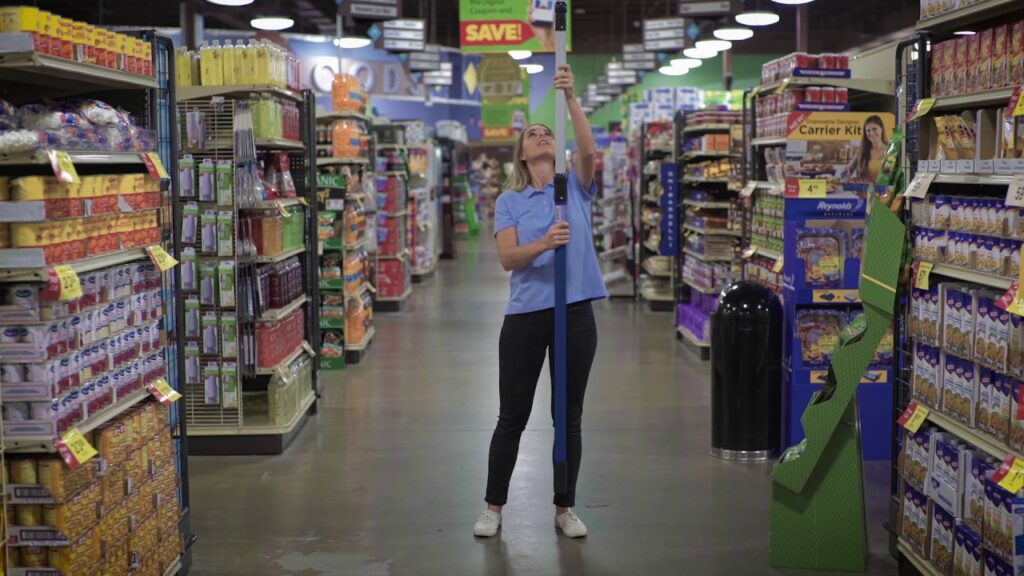
Ladders and lifts may be appropriate for some applications, but they do not have to be the automatic choice for every sign change. When the ceiling and hanging hardware are compatible, floor-level installation can provide a more efficient way to install, adjust, and remove overhead signage.
The Clik-Clik™ System is designed specifically for this approach.
MagPoles™ provide extended reach from floor level, while MagMovers™ are used to position and retrieve ClikMagnets™ overhead. LoopLine™ provides the suspension connection between the ceiling hardware and the display.
Together, these components can allow signage to be installed and changed without climbing a ladder, making the system particularly useful for retail stores, warehouses, schools, offices, and other facilities where overhead displays change regularly.
Explore the Clik-Clik™ System
The Clik-Clik™ System combines MagPoles™, MagMovers™, ClikMagnets™, and LoopLine™ to create a reusable approach to floor-level sign installation.
[Shop the Clik-Clik™ System] | [Build a Kit]
5. Standardize the Process Across Locations
Consistency becomes especially important when signage is installed at multiple stores, facilities, departments, or event locations.
If every location develops its own method, hardware and installation techniques can vary. Standardizing the components and process gives installers a repeatable method and makes purchasing, training, troubleshooting, and future sign changes easier to manage.
For organizations with multiple locations, this can mean establishing a standard hanging package based on ceiling type, ceiling height, and signage requirements.
Clik-Kits can simplify this process by grouping compatible Clik-Clik™ components for different installation heights. Organizations can also develop their own standardized packages of ceiling hangers and hardware based on the requirements of their facilities.
Keeping commonly used replacement components available can further support the process when a magnet, hook, clip, or other small component is lost or needs replacement.
The objective is simple: the installation should not have to be reinvented every time the signage changes or a different employee handles the job.
6. Design for the Next Sign, Not Just This One
Good planning considers both today’s installation and what will happen when the display changes.
Before selecting a hanging method, ask a few practical questions. Will the sign remain in place for years, or will the graphics change next month? Will the suspension hardware stay in place? Can components be removed and reused? Will future employees know what hardware was originally installed?
Those questions can influence the system you choose today.
Reusable ceiling connections, suspension materials, and hardware for hanging signs can reduce the amount of material and labor required for future changeouts. Standardizing those components can make the process even easier across multiple locations.
The result is a hanging system designed not simply to get today’s sign into position, but to support the next promotion, display, or signage change as well.
Putting It All Together
A successful suspended signage installation begins with planning the complete system—not simply choosing a hook, cord, cable, or magnet.
Start at the ceiling and work down:
Ceiling connection → Suspension material → Sign connection → Sign
Identify the ceiling type, determine the requirements of the display, select compatible components, consider how the installation can be completed efficiently, and think about how the signage will change in the future.
This approach helps you avoid common ceiling sign hanging mistakes. It creates consistent, repeatable hanging systems from the ceiling, whether you are planning one display or coordinating signage across hundreds of locations.
Explore our complete ceiling hanging solutions, or learn more in The 5 Easiest Ways to Hang Signs Without Damaging Your Ceiling and What Can You Hang from S-Hooks?
Frequently Asked Questions
How do you hang a sign from the ceiling?
Start by identifying the ceiling type, then work downward through the complete hanging system. Consider the ceiling connection, suspension material, sign-connection hardware, sign construction, and total suspended weight. Drop ceilings, open-beam structures, and finished ceilings may require different connection methods, so there is no single solution for every installation.
How can you avoid common ceiling sign hanging mistakes?
Start with the ceiling type, then plan the complete system from the ceiling connection down to the sign. Reusable components, floor-level installation, and a standard process across locations help every changeout go smoothly.
What should I consider before selecting ceiling sign hanging hardware?
Consider the ceiling type, total suspended weight, sign size and substrate, attachment-hole location, number of suspension points, installation height, and how frequently the signage will change. Each component should be compatible with the other components in the hanging system and appropriate for the intended application.
When should I be concerned about a sagging ceiling or attachment point?
If a ceiling tile, grid, attachment point, or other component visibly sags, bows, cracks, or moves after a display is installed, remove the load and determine the cause before reinstalling it. The ceiling connection and supporting structure must be appropriate for the intended load.
How do I securely hang something from the ceiling?
Consider the complete load path from the ceiling to the display. The ceiling connection, suspension material, sign connection, attachment points, and sign substrate all need to be appropriate for the application. Do not rely solely on the weight rating of one component when evaluating the complete installation.
What is the best way to hang a sign?
There is no single hanging method that is best for every application. The appropriate system depends on the ceiling type, display weight and construction, installation height, frequency of sign changes, and installation environment. Choosing a system around those factors can make signage easier to install, maintain, and change over time.