Installing the right hooks or cables for hanging signs and displays can make the difference between a smooth, professional install and a frustrating, time-consuming mess. Hanging a sign might seem simple until you’re halfway up a ladder, wrestling with tools, cutting connecting cord or a ceiling connector that doesn’t fit. The truth is, your choice of hardware directly affects the safety, speed, and finish of every installation.
Whether you’re overseeing signage for 200 retail locations or preparing banners for a local event, the right combination of hooks and cables will save time, minimize risk, and ensure consistent results. In this guide, we’ll show you how to select the best hanging hardware based on ceiling type, sign weight, and installation requirements.
Why isn’t sign hanging hardware one-size-fits-all?

Not all ceilings are built the same, and sign hanging hardware must match the structure supporting it. A suspended grid ceiling in a retail store has very different requirements than an open beam warehouse or a finished drywall ceiling in a conference center. Using the wrong hardware for the environment or sign weight can lead to damaged ceiling systems, uneven displays, and unnecessary rework.
Without a clear plan, installers may force incompatible hooks into ceiling grids, rely on connectors that are not rated for the load, or spend extra time correcting signs that hang crooked or sag over time. These issues slow down installs, reduce display quality, and increase safety risks.
The best installs start by understanding the ceiling structure, the weight and size of the sign, and how often the display will change. Once those factors are clear, selecting the right hooks and suspension method becomes straightforward and repeatable.
The best installations begin with a few simple questions:
-
What kind of ceiling are you working with?
-
How much does the sign weigh?
- What is the size of the sign?
- What material is the sign made from?
-
Will this be a one-time setup or something that changes often?
Once you know the answers, it becomes much easier to choose hardware that works with your environment instead of against it.
Matching your hardware to your space brings real advantages. You can reduce the need for ladders, lower the risk of ceiling damage, and improve the speed and consistency of your signage installs. Whether you’re hanging a single banner or coordinating displays across dozens of locations, the right hardware makes the entire process smoother and more reliable.
What suspension method works best for signs that change often?
Lightweight Signs: Use Tangle-Free, Knot-Free Suspension
When signage changes frequently, such as promotions, seasonal retail graphics, or rotating visual merchandising displays, the suspension system needs to support fast adjustments without re-tying knots or re-cutting materials.
The Clik-Clik™ system, which includes LoopLine™ and ClikMagnets™ that attach directly to the T-bar grid, is designed for lightweight signage that needs to be installed, removed, and adjusted quickly while maintaining consistent height and alignment.
Instead of relying on knots or fixed-length connectors, the system allows installers to fine-tune sign height and spacing using repeatable connection points that support the required load without unnecessary bulk or complexity.
When should you use steel cable?
When weight becomes a factor due to the size and weight of the sign like you find in warehouses, big-box retail, or industrial settings, steel cable offers a safe, long-term solution. The 1/16″ steel cable is particularly effective for heavier loads.
Why choose steel cable:
- High tensile strength for weight-bearing signage
- Durable under long-term tension
- Pairs with beam hooks and industrial anchors
- Ideal for banners, wayfinding signs, and structural environments
Steel cable does require more upfront planning because it is typically used for heavier or long-term signage where load ratings and attachment points matter.
Planning considerations include:
-
Confirming the weight and dimensions of the sign
-
Identifying secure structural connections like beams or purlins
-
Selecting the appropriate cable diameter and load rating
-
Determining finished sign height before cutting cable
Which ceiling hook should you use for your sign type?
Your ceiling structure dictates what type of hook you should use. Here’s how to make the right match:
What hooks are best for hanging signs from suspended grid (T-bar) ceilings?
This is the most common ceiling type in retail, schools, and offices. The best hardware attaches directly to the grid without damaging tiles.
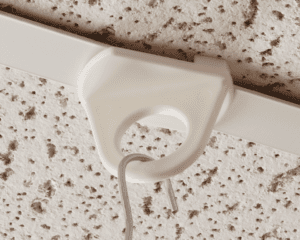
- E-Z™ Rectangular Twist-On Ceiling Hook: Fast to install, tool-free, and secure on standard T-bar ceilings.
- U-Hook with Binder Post: Attaches directly to the sign, not the ceiling. The U-Hook connects to LoopLine™ or steel cable, which then attaches to a ceiling clip or ClikMagnet™ on the T-bar grid. This setup allows signs to hang lower or pivot slightly while remaining easy to remove and reuse.
Pro tip: Always use ceiling clips designed for standard T-bar grid systems so they attach securely without bending or damaging the grid.
What hardware should you use for open beam or industrial ceilings?
These ceilings demand more rugged hardware that grips securely and supports additional weight.
- E-Z™ Solid Beam Metal Ceiling Hook: Specifically shaped to latch securely onto I-beams or solid structures.
- UrbanTrapeze™ with Gated J-Hook: Allows for fast height adjustments, ideal for varying ceiling heights or heavier loads.
- Purlin Clip: Designed for metal purlins commonly found in warehouse and industrial ceilings where standard beam hooks are not compatible
Industrial ceilings provide fewer options, so it’s crucial that hardware locks into place and will support the constant load of the sign without slipping, shifting, or loosening over time.
What are the best hooks for quick-change installations?
Some environments call for signage that’s up one day and down the next, like event spaces, seasonal retail departments, or school gyms.
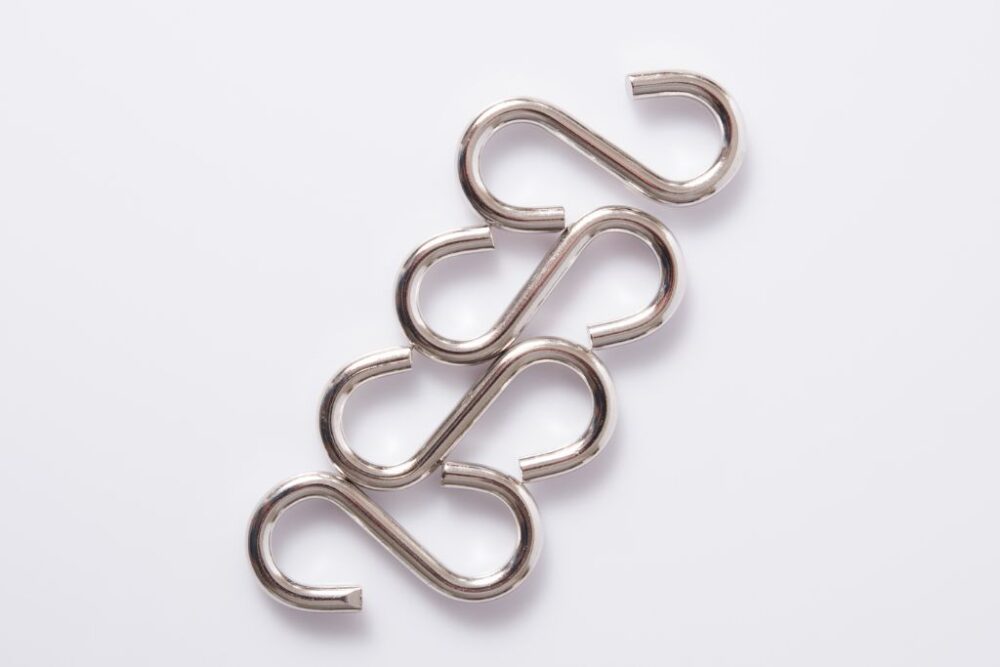
- E-Z™ S-Hook: These lightweight, open-ended hooks are perfect for fast swaps. They come in two sizes and are also easy to combine with both LoopLine™ and steel cable.
Bonus: Keep extra S-hooks on hand for quick sign swaps, temporary retail displays, or last-minute signage changes. S-hooks act as connectors between the sign and a suspension line or cable and must always be paired with an appropriate ceiling clip or hook.
How does ceiling material affect sign hanging hardware?
 Always consider the ceiling material before selecting your hardware. For drop ceilings or T-bar systems, twist-on ceiling clips or ClikMagnets™ are typically the best option since they attach securely to the grid without damaging ceiling tiles. Binder-post hooks are used at the sign connection point and pair with LoopLine™ or steel cable rather than attaching directly to the ceiling.
For open beam or I-beam structures, use hooks specifically designed for beams paired with steel cable for maximum strength and safety. DIY fixes can compromise security and should be avoided. When in doubt, choose reusable, non-damaging solutions that install cleanly without power tools or permanent ceiling modifications.
What are common mistakes to avoid when hanging signs?
Let’s be real. Sign installs rarely happen under ideal conditions. More often than not, they are squeezed in between store openings, seasonal resets, staffing gaps, or last-minute event deadlines. When time is short and pressure is high, it can be tempting to reach for whatever materials are available or fall back on methods that seem faster in the moment. But cutting corners in the name of speed usually leads to bigger problems later.
Some of the most common mistakes include using fishing line (monofilament), which is difficult to tie securely to ceiling clips or signs and makes it hard to level signs when using two lines. Paperclips are another frequent shortcut. They damage ceiling tiles, are not load-rated, and create unreliable connection points. Zip ties are also problematic since they cannot be adjusted and must be cut and replaced when mistakes occur.
Each of these missteps increases the risk of rework, employee injury, and signage that looks rushed or unprofessional. Over time, these issues cost more than just minutes. They impact safety, brand presentation, and the overall efficiency of your signage process. The best way to avoid them is by starting with the right hardware, chosen specifically for the type of ceiling, the weight of the display, and how often signage needs to change.
How can you standardize sign installs across multiple locations?
 Industries like retail chains, schools, and franchises often need consistency across dozens or hundreds of sites. The secret? Use tools that reduce training time, eliminate guesswork, and make the job safer.
Reusable options like UrbanTrapeze™ and LoopLine™ and steel cable systems make it easier to train rotating staff, standardize sign height, reduce install time, and make the job safer.
With pre-cut lengths, simple hook systems, and minimal tools, your team can easily install signage in less time, without compromising safety or appearance.
Final Takeaways: How to Hang Signs Smarter
So, if you’re trying to figure out which hooks and cables for hanging signs work best, start by identifying your ceiling type. Whether it’s grid, drywall, or open beam, that detail determines which hardware you should trust. From there, match your hardware to the weight of the sign. S-hooks are great for lightweight, temporary installs, but heavier signs call for steel cable and more secure hooks.
Whenever possible, choose reusable components that save time and reduce waste during future installs. And avoid DIY shortcuts. Professional tools deliver better results, faster setups, and safer environments. The right hook or cable might seem like a small detail, but it makes a big difference in the overall quality, consistency, and safety of your signage.
Ready to get the job done right? Explore all ceiling sign hanging accessories at Ceiling Outfitters and find the tools that match your ceiling, your signage, and your schedule.
FAQs
- What is the safest way to hang signs from a drop ceiling?
Use twist-on ceiling clips such as ClikMagnets™ that require no tools and won’t damage tiles. - Can I use zip ties to hang ceiling signs?
Not recommended. They’re non-adjustable and require cutting and replacement for any error. - What’s the weight limit for LoopLine™?
LoopLine has two tensile strengths: 10 lb. in clear and 25 lb. in white, clear, and black. Make your choice based on the weight of the sign and the ceiling clip to which you are attaching LoopLine. - How do I know which ceiling hook to use?
It depends on your ceiling type. T-bars need twist-on hooks; beams need clamp-style options. - Are these tools reusable for multiple installs?
Yes. Most Ceiling Outfitters hardware is built for repeat use and easy adjustment.